
Contents
- How to Apply a Filter Only to Yourself in a Shared Excel Workbook
- ✅ Why Filters Affect Everyone in a Shared Excel Workbook
- ✅ The Solution: Use “Sheet View” to Filter Only Your Own Data
- ✅ Step-by-Step: How to Apply Filters Only for Yourself Using Sheet View
- ✅ Example Scenarios Where Private Filtering Helps
- ✅ Troubleshooting and Common Questions
- ✅ Additional Collaboration Tips for Shared Excel Files
- ✅ Advantages of Using Sheet View
- ✅ When Sheet View Isn’t Available (Alternative Options)
- ✅ Summary: How to Filter Only for Yourself in Shared Excel
When collaborating with colleagues on a shared Excel workbook, you might have noticed something frustrating — whenever you apply a filter, it changes for everyone. Suddenly, your teammates lose their view and wonder what happened to their data.
If you’ve ever thought, “I just want to filter the data for myself without affecting others,” this guide is for you.
In this article, you’ll learn why shared Excel filters behave this way, how to use Excel’s “Sheet View” feature to apply filters only to yourself, and what to keep in mind when working in shared workbooks to avoid confusion and data loss.
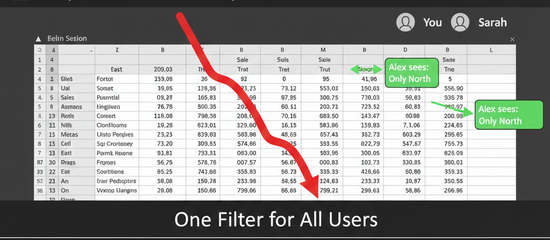
When multiple people edit a shared Excel file — for example, through OneDrive or SharePoint — Excel automatically synchronizes actions such as sorting, filtering, or hiding rows.
This means if one user filters for “Region = East,” everyone else’s view also changes to that filter.
In a shared workbook:
- Each person is technically working on the same live worksheet view.
- Filters, sorts, and formatting changes are applied universally.
- Excel does this to keep data consistent across the collaboration session.
While this makes sense for some teamwork scenarios, it can cause problems when each user wants to analyze data independently.
✅ The Solution: Use “Sheet View” to Filter Only Your Own Data
Microsoft introduced a feature called Sheet View (available in Microsoft 365 and Excel 2021 or later).
Sheet View allows each user to apply their own filter and sort order — visible only to them — without changing what others see.
Let’s see how it works.
✅ Step-by-Step: How to Apply Filters Only for Yourself Using Sheet View
Here’s a simple walkthrough to create your private filter view in a shared workbook.
To use Sheet View, the Excel workbook must be stored in OneDrive or SharePoint — local or offline files won’t support it.
You can upload your Excel file by:
- Opening it in Excel → File → Save As → OneDrive / SharePoint.
- Or, uploading it directly via your web browser to your organization’s OneDrive folder.
Once the file is shared with colleagues, everyone can edit simultaneously.
・Step 2: Activate Sheet View Mode
When you start filtering or sorting in a shared workbook, Excel often detects that multiple users are active.
You’ll see a message at the top:
“Would you like to see everyone’s view or just yours?”
Click “Just Mine.”
This creates a private Sheet View just for you.
Alternatively, you can manually enable it:
- Go to the View tab.
- In the “Sheet View” group, click New.
- Excel switches to a temporary personal view.
Now you can safely apply filters — they won’t affect anyone else.
・Step 3: Apply Filters and Sorts Freely
Once your Sheet View is active:
- Apply filters in the usual way (e.g., filter by “Status = Completed”).
- Sort columns by date, name, or value.
- Hide or unhide columns and rows as needed.
All these actions are local to your Sheet View — other users still see the full dataset.
💡 Tip: You’ll notice a small “eye” icon next to the sheet name, confirming you’re in your own view.
・Step 4: Save or Exit Your View
When finished:
- Go to View → Sheet View → Exit to return to the shared default view.
- Or, Save your Sheet View if you’ll reuse it. You can even rename it (e.g., “My Sales Filter”).
Next time you open the workbook, you can return to your saved view instantly.
✅ Example Scenarios Where Private Filtering Helps
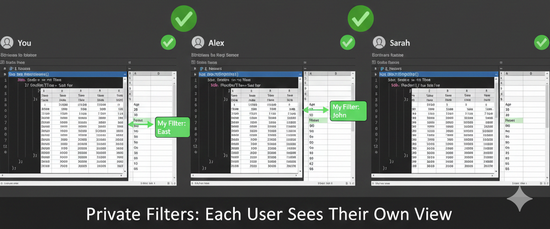
Let’s look at real workplace examples where this feature is extremely useful.
・Sales Teams Tracking Individual Performance
Each salesperson wants to review only their accounts.
Using Sheet View, “Alice” filters for “Salesperson = Alice,” while “Bob” filters for “Salesperson = Bob.”
Neither interferes with the other’s view, and both can work in real time.
・Finance Departments Reviewing Transactions
An accounting team shares one workbook for all transactions.
Each reviewer filters by “Approval Status = Pending” or “Region = East.”
With Sheet View, everyone can audit their section independently — no overlapping filters.
・Project Management Dashboards
Project managers track tasks across multiple departments.
Each manager can filter by “Assigned To = Me” or “Due Date < Today.”
No one overwrites another’s sort order or visibility settings.
How to Use Sheet View in Excel: A Complete Guide for Independent Filtering in Shared Workbooks
✅ Troubleshooting and Common Questions
Even though Sheet View simplifies collaboration, there are a few things to keep in mind.
・1. My Filters Still Affect Others
Check that you’re truly in Sheet View mode.
If the “Sheet View” icon isn’t active, you’re working in the global default view — meaning your filters are shared with everyone.
・2. The “See Just Mine” Prompt Doesn’t Appear
Some Excel versions (especially older or desktop-only builds) don’t automatically prompt you.
In that case, activate Sheet View manually from the View tab → Sheet View → New.
・3. Other Users’ Changes Affect My Sheet View
Sheet View isolates filters and sorts but doesn’t isolate data edits.
If another user edits or deletes rows, you’ll still see those changes — it’s the same shared dataset.
・4. I Want to Keep My View for Later
Click the dropdown next to “Temporary View” and select Save View.
You can create multiple named views (e.g., “My Clients,” “Pending Orders,” etc.) for quick access.
Why Excel Sheet View Is Not Working: Causes and Fixes
・Avoid Editing Structural Elements While Others Are Working
Inserting rows, deleting columns, or changing table headers can confuse shared filters.
Communicate before making structural changes.
・Use Comments or Notes Instead of Highlighting
Highlighting cells (with color) can affect others’ visibility.
Instead, use Excel’s Comments or Notes feature to leave feedback that doesn’t visually alter others’ screens.
・Always Confirm You’re in the Correct View
Look at the sheet tab at the bottom:
- If you see a black “eye” icon → You’re in Sheet View (safe).
- If not → You’re in the shared default view (filters affect everyone).
✅ Advantages of Using Sheet View
| Benefit | Description |
|---|---|
| Independent Filtering | Each user can apply filters without disrupting others |
| Real-Time Collaboration | All users can edit simultaneously |
| Custom Sorting | Personal sort order stays private |
| Reusable Views | Save and switch between personal views |
| Better Focus | View only the data relevant to you |
With these benefits, Sheet View has become one of the most underrated yet powerful Excel collaboration features.
✅ When Sheet View Isn’t Available (Alternative Options)
If you’re using an older version of Excel that doesn’t support Sheet View, try these alternatives:
- Make a personal copy of the workbook (
File → Save As → My Copy.xlsx) to apply your own filters independently. - Use Excel Online — this always supports Sheet View.
- Use filters in Pivot Tables for personalized summaries without affecting the main data.
Although less convenient, these methods still allow separate analysis while keeping shared data intact.
- In shared workbooks, filters normally affect everyone.
- Use Sheet View to apply filters and sorts only visible to you.
- Store files in OneDrive or SharePoint — Sheet View works only there.
- Activate your personal view via View → Sheet View → New, or click “See Just Mine” when prompted.
- Save your view for reuse and confirm the “eye” icon appears.
- Remember that data edits are still shared, but filter and sort operations are private.
- Perfect for sales teams, finance groups, and project dashboards where each person needs their own view.
By mastering Excel’s Sheet View, you can collaborate efficiently in shared workbooks — analyzing the data that matters to you while keeping everyone else’s screen untouched.